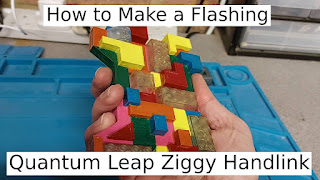
Building a Ziggy Handheld
Quantum Leap was an obsession of mine during the 90s and I'm still a huge fan of the show even now. As we'll be off to another comic con shortly, I wanted to try and make another prop to take along to the even and the Ziggy handheld that featured in the original series seemed a great ideas as it would be challenging to make but would be easy to carry around with me on the day. The short video below details how it was made with downloadable resources further down this page.
The first thing I did was to pull up some reference material in the form of screenshots that clearly shows the handheld. There are also props that you can buy and the images they had on the various websites were a lot more detailed.
From here I was able to build a simple model from within Tinkercad. I made sure I included the main blocks of the design and made up the more smaller components. I thought if I could achieve the general look and outline of the handheld, then it will be easily recognisable. I wanted to include a few blocks that lit up as in the show, and realising that even if I 3d printed the illuminated blocks really thinly, they still wouldn't look very good. Clear Lego blocks would be used instead as these fit so well with the theme of the build and they also allow LEDs to be inserted into them really easily - Bonus! There is a copy of the model for you to download and print here.
Once printed, the blocks were painted as true to the original on-screen colours as possible and once completed they were then varnished.
The 'brains' of the Ziggy handlink build is a simple Microbit programmed to control a series of LEDs tat will blink randomly on a continuous loop. This required quite a bit of time and testing as I wanted to try and use the least amount of output pins to help save space due to using fewer wires. I managed to only use three pins to control six LEDs which should be enough to make the Ziggy handheld look convincing. You can download the Microbit Hex file here.
Once the 3d printed top plate was dry after being painted and varnished, the Microbit and its wiring were threaded through the holes and embedded into the clear Lego bricks before being hot glued into position.
It's always a nervous time when all project elements come together with any project - Something always seems to break and takes an age to fix but this time the assembly went as smoothly as it could have.


Comments
Post a Comment